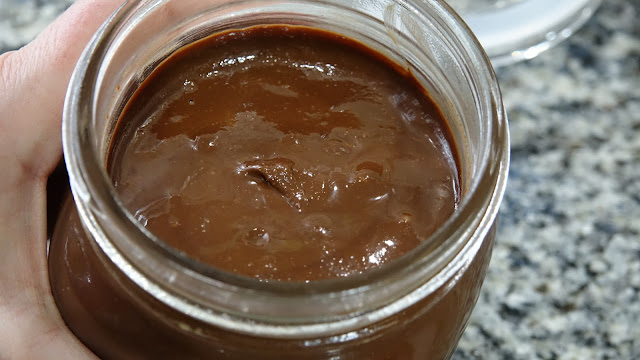
Chocolate Hazelnut Spread
When I was a kid we used to eat chocolate hazelnut spread (specifically Nutella!) everyday after going to the corner store to buy fresh Italian bread. My friend Kim's Mom would slice big fat slices of bread and we would slather on the Nutella every afternoon as soon as we got home from school. My Dad would make crepes ("Palacinka" - which are a Slovak version) and he would sprinkle lemon and sugar or Nutella on them for me and jam on them for him! Of course you can buy spread in the store but, I like my version because I know the quality of ingredients is higher and I know what's not in them! preservatives.
I was just recently in Milan and Genoa and when in Eataly I found an entire shelf of better quality versions but in most North American places it might be difficult to find anything other than the basic versions. I did find an Organic version in my local grocery story but why not try making your own. It makes a nice gift and can be used in Crepes, on Croissant or even melted and poured over Ice Cream!!
If you want to use a different type of nut or a combination of nuts go ahead !! experiment away!
You will need:
- 1 cup of hazelnuts (if you have hazelnut butter you can use that instead)
- 12 oz of Milk Chocolate (or of course you can make the dark version)
- 1 tbsp cocoa powder
- 3 tbsp Extra Virgin Olive Oil - I used Bondolio from California
- 1 tsp Vanilla extract (pure never artificial)
- 1/4 tsp sea salt
- 1/4 tsp cinnamon
- 1 tbsp pure maple syrup
I made both a milk chocolate and a dark chocolate version.
Step 1: place hazelnuts ( also sometimes called filberts) on a baking sheet and toast for 8 -12 minutes - turn them halfway and be careful to watch they do not burn. Once they come out of the oven place in a clean tea towel (kitchen towel) and try to rub some of the outer husk off- I never get them clean if the hazelnuts are fresh so don't worry if there is lots left on. I leave the husks and place the somewhat cleaned nuts in the food processor or a good quality blender to make into butter. If you happen to find hazelnut butter you ca use that and skip this step.
Step 3: I washed a few little jars for my finished spread. Although these are cute I would suggest a plain glass jar so that you can microwave for 10-30 seconds to get the spread more liquid when you want to use it. Because there are not preservatives in the spread it will thicken and harden especially if you keep it in the fridge. You can microwave for a few seconds before spreading which brings it back to is almost liquid consistency. It is essentially a nut butter with chocolate.
Step 5: in a heat proof container melt the chocolate in the microwave for 1 minute then stir, melt again for 30 seconds and stir and only if necessary melt for a final 30 seconds.
YUM!!


Comments
Post a Comment